

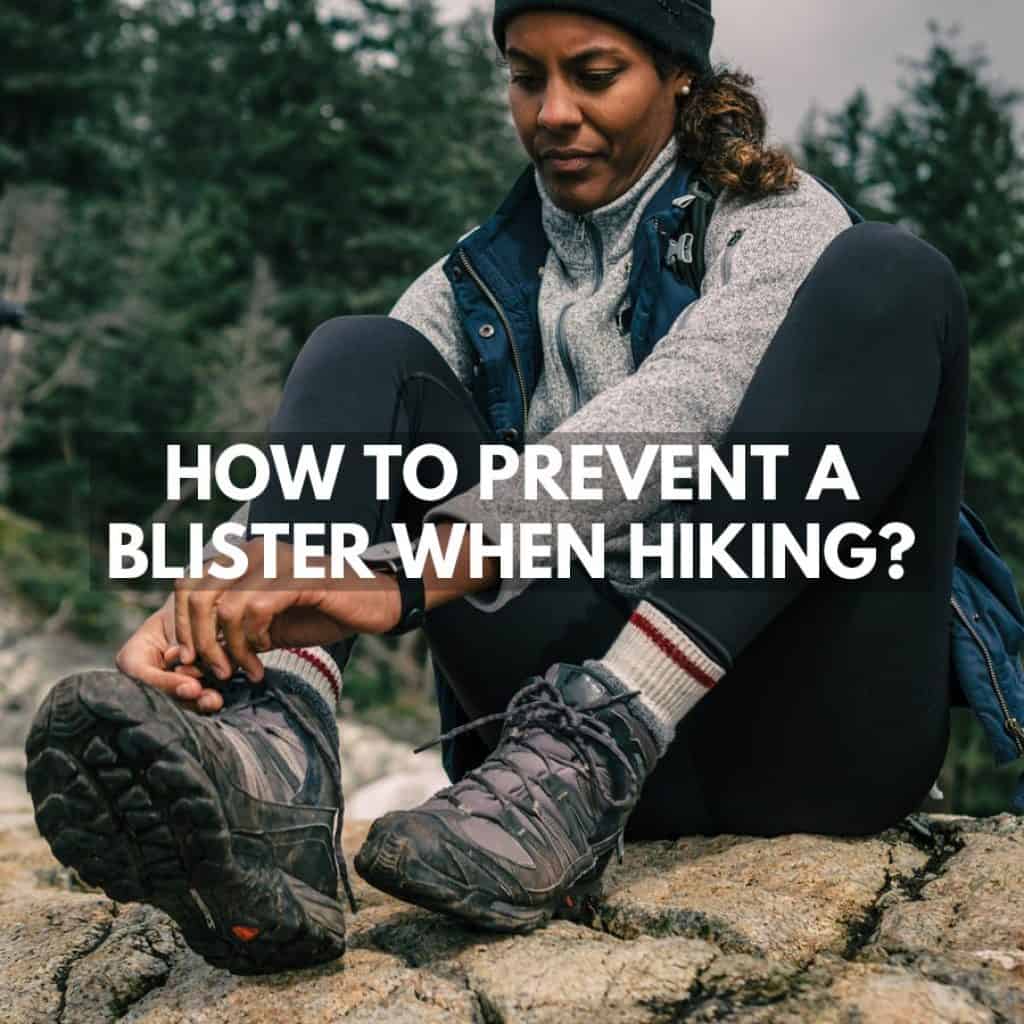
How to Prevent Blisters When Hiking
Blisters can turn an otherwise great hike into a miserable one surprisingly quickly. The best way to prevent them is to wear footwear that fits properly, keep your feet as dry as possible, choose good hiking socks, and deal with any hot spots as soon as you notice them.
I’ve had enough blisters over the years to know that prevention is far easier than trying to deal with one halfway through a long hike.
Footwear is still the biggest thing I pay attention to, but it isn’t the only factor. Socks, moisture, debris, lacing, foot shape, and how quickly you react when something starts rubbing can all make the difference.
Popping a blister when hiking should normally be avoided if you can protect it and allow it to heal intact. Prevention is much easier than trying to manage a painful blister once you’re already miles from the end of a route.
THE QUICK VERSION
- Wear footwear that fits properly.
- Don’t start a long hike in untested boots or shoes.
- Use moisture-wicking hiking socks rather than cotton.
- Keep your feet and socks as dry as possible.
- Adjust your laces if your heel is moving around.
- Stop immediately when you feel a hot spot.
- Carry tape, blister dressings or moleskin.
Why Do You Get Blisters From Hiking?
Hiking blisters develop when repeated movement creates shear and friction within the layers of your skin.
Your footwear may be rubbing directly against your foot, but the problem can also come from your foot sliding around inside the shoe while your sock and outer skin move differently.
Pressure, heat and moisture can make the situation worse.
This is why a pair of boots can feel absolutely fine for the first few miles and then suddenly start creating problems later in the day.
Sweat softens the skin, your feet can swell slightly, and thousands of repeated steps gradually irritate the same area.
A poor sock choice can contribute too.
I generally prefer wool or good synthetic hiking socks because they manage moisture much better than cotton and are designed with flatter seams and cushioning in the right areas.
Debris inside your footwear can also create an instant friction point. A tiny stone or bit of grit that doesn’t feel particularly serious at first can become incredibly irritating after a few thousand steps.
What Is a Hot Spot?
A hot spot is the warning you get before a blister properly develops.
You might feel:
- A warm or burning sensation
- A small area rubbing with every step
- Tingling or tenderness
- Red skin when you remove your sock
This is the point where I stop.
It is very tempting to think, “I’ll look at it at the next break,” especially if you’re walking with other people.
Don’t.
Two minutes spent adjusting your sock or applying some tape can save hours of discomfort later.
Common Places to Get Blisters
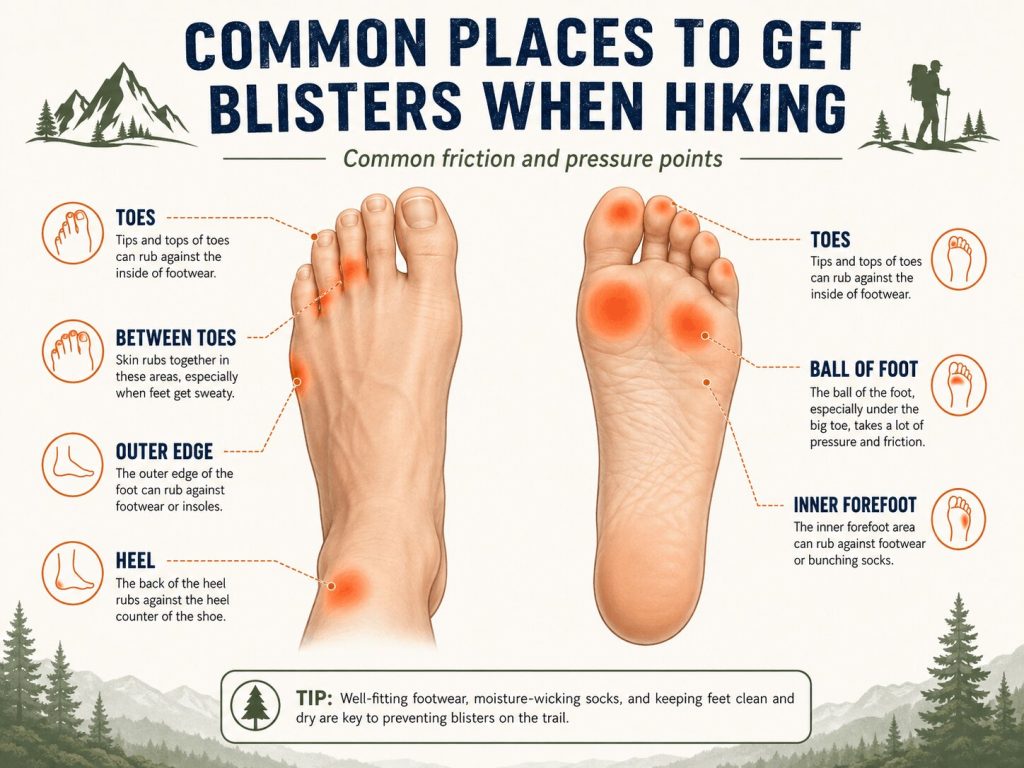
You can develop a blister almost anywhere on your foot, but some areas cause problems far more often than others.
Sole and Ball of the Foot
The sole takes enormous pressure during a long hike.
The heel and forefoot around the ball of your foot carry much of your weight, and repeated movement between your foot, sock and insole can eventually create irritation.
Blisters underneath the forefoot can be particularly unpleasant because you can’t easily avoid putting weight on them.
Good socks and a well-fitting insole can help.
But I wouldn’t automatically solve this by adding more and more cushioning. An insole that changes the fit of your footwear or makes the shoe too tight can create a different problem.
Heel
The back of the heel is probably the classic hiking blister location.
It usually happens because your heel is lifting slightly inside the boot with every step.
A tiny amount of movement doesn’t sound significant, but repeat it thousands of times and the skin starts to suffer.
The first thing I check is the fit.
If the heel cup simply doesn’t suit the shape of your foot, no amount of clever lacing is going to make it perfect.
But if the fit is generally good, changing the way you lace the top of the boot can often hold your heel more securely.
Thicker socks or liner socks can sometimes help fill a small amount of unwanted space, although you don’t want to make the footwear excessively tight.
Toes
Toe blisters often come from rubbing between toes or your toes making repeated contact with the front and sides of the shoe.
Long descents are particularly good at exposing a poor fit.
If your foot slides forwards every time you step downhill, your toes can spend hours repeatedly hitting the front of the boot.
Your footwear should have enough room for your toes to move naturally even when your feet swell during a long day.
Toe socks work well for some hikers because they separate the toes and reduce skin-on-skin rubbing.
I have also found a small amount of lubricant useful on areas that repeatedly rub.
Sides of the Foot
The outside edge of the little toe and the inside of the forefoot around the big toe joint are other common areas.
This often comes down to footwear width.
If you have broad feet and squeeze them into a narrow shoe, there may be constant pressure on those areas from the beginning of the hike.
Likewise, footwear that is too wide can allow excessive lateral movement.
This is one reason I wouldn’t recommend a hiking boot purely because somebody else finds it comfortable.
Foot shape matters just as much as the quality of the boot.
10 Ways to Prevent Blisters When Hiking
These are the things that have made the biggest difference for me over the years.
1. Get the Footwear Fit Right
This is the most important place to start.
It doesn’t really matter whether you prefer boots, hiking shoes, trail runners or hiking sandals if they fit your feet properly.
Your toes should have room to move and shouldn’t hit the end when walking downhill.
At the same time, your heel shouldn’t be sliding noticeably up and down.
I would never compromise on comfort because I liked the appearance, brand or specifications of a particular boot.
If a shoe already feels wrong in the shop, I don’t expect it to magically become perfect after twenty miles.
A good pair of hiking boots for long-distance walking should feel secure without creating obvious pressure points.
2. Test New Footwear Before a Big Trip
Modern lightweight footwear doesn’t always need the traditional weeks-long “breaking in” that heavy leather boots once did.
But I still wouldn’t take an untested pair straight onto a multi-day trip.
The important thing is discovering problems before you’re committed to walking another 50 miles.
I normally start by wearing new footwear around the house.
If everything feels good, I’ll take it on a shorter walk.
Then I’ll increase the distance before trusting it on a long trip.
This gives your feet and footwear some time together and exposes any rubbing, pressure points or fit problems while they’re still easy to solve.
The same applies to lightweight hiking boots and trail shoes.
3. Learn How to Adjust Your Lacing
You don’t necessarily need to lace every part of a hiking boot equally tightly.
Different lacing techniques can help secure the heel, relieve pressure on the top of your foot, or create more room in specific areas.
If I’m getting heel lift, I’ll tighten the lacing around the ankle and use the upper hooks to hold my heel farther back into the heel cup.
The bottom section can remain comfortably snug rather than crushing my toes.
One mistake is simply pulling every lace as tight as possible.
That can create pressure points and restrict your feet as they naturally swell during a long hike.
4. Wear Proper Hiking Socks
Hiking socks make far more difference than ordinary everyday socks.
I avoid cotton for long walks because it holds moisture and becomes uncomfortable once your feet start sweating.
Merino wool and synthetic hiking socks manage moisture better and normally have cushioning in the heel and forefoot.
They also tend to have much flatter toe seams.
A bulky seam rubbing against the same toe for twenty miles can be enough to create a blister.
I have a separate guide to choosing the best hiking socks if you want to go deeper into materials and thickness.
5. Try Liner Socks or Two Pairs
I’ve had good results wearing two layers of socks.
The idea is that some of the movement happens between the two sock layers rather than directly against your skin.
I normally use a very thin liner sock underneath a normal hiking sock rather than wearing two thick pairs.
You do need enough room inside your footwear.
If adding a second sock makes the boot too tight, you’ve potentially made the blister problem worse rather than better.
This isn’t something everyone needs, but if you repeatedly get blisters despite otherwise well-fitting footwear, it can be worth experimenting with.
6. Keep Your Feet Dry
Moist skin is generally more vulnerable to rubbing and damage.
On long days, I sometimes take my boots and socks off during a proper break and let my feet dry.
It feels great anyway.
On multi-day trips, I also like carrying more than one pair of socks so I can switch to a dry pair if the first ones become soaked.
If you repeatedly get debris or water entering around the ankle, gaiters can help in some conditions.
Keeping your feet dry doesn’t mean they’ll never blister, but it removes one of the things that can make friction more damaging.
7. Use Lubricant on Known Problem Areas
If I know a specific part of my foot tends to rub, I’ll sometimes apply a small amount of petroleum jelly or an anti-chafing balm before setting off.
This reduces surface friction.
A small tin of Vaseline weighs almost nothing and can also be used on other areas that start chafing.
I don’t cover my entire foot in huge amounts of it.
I concentrate on the places I know historically give me trouble, particularly around toes or other recurring friction points.
8. Stop and Check Your Feet
This becomes more important the farther you’re walking.
If I’m doing long days, particularly on a multi-day route, I pay attention to how my feet feel throughout the day rather than waiting until camp.
Take your boots off during breaks.
Straighten your socks.
Remove any grit.
Let your feet breathe.
Look for redness.
It only takes a few minutes and gives you the opportunity to catch problems early.
9. Protect Hot Spots Immediately
As soon as I feel a hot spot, I stop and deal with it.
Depending on where it is, I might use:
- Sports or paper tape
- Moleskin
- A blister dressing
- A small amount of lubricant
- A sock adjustment
- A lacing adjustment
The exact product matters less than removing or reducing whatever is creating the repeated irritation.
Tape works particularly well for me when applied before a blister has properly developed.
Once there is a fluid-filled blister, dealing with it becomes more complicated.
10. Carry a Small Foot-Care Kit
I carry a few basic things on longer walks rather than assuming I’ll be able to buy them when I need them.
You don’t need a huge medical kit just for blisters.
A simple setup might include:
- A small roll of tape
- A couple of blister dressings
- Moleskin or similar padding
- A tiny lubricant or petroleum jelly container
- A spare pair of socks
Those few items weigh very little but can rescue a long day if your feet start causing problems.
Does Changing the Way You Walk Help?
Sometimes, but I wouldn’t rely on it as the main solution.
If I already have a developing hot spot, I may temporarily change my foot placement to reduce pressure on that area.
This can be particularly useful while traversing a steep slope where one side of your foot is constantly being pushed into your footwear.
But deliberately walking strangely for hours can create problems elsewhere.
If a hotspot is forcing you to alter your walking style, I would rather stop and deal with the cause properly.
What Should You Do When You Feel a Hot Spot?
Stop walking as soon as practical.
Remove your footwear and sock and look at the area.
If the skin is simply red and irritated, you’re in the best possible position to prevent the blister.
Check whether:
- Your sock is wrinkled.
- There is grit or debris inside the shoe.
- Your heel is slipping.
- Your toes are being squeezed.
- Your sock is soaking wet.
Fix whatever you can and then protect the skin.
Tape or a blister patch can reduce further irritation.
The important thing is not to pretend you can’t feel it and walk another five miles.
Should You Pop a Hiking Blister?
Usually, I try not to.
The intact skin over a blister provides natural protection while the area underneath heals.
If a blister bursts on its own, keep the area clean and protected.
There are situations where a large or extremely painful blister may need more careful treatment, but this is where I would follow proper first-aid guidance rather than casually sticking a needle into it at the side of the trail.
I’ve covered this separately in my guide to whether you should pop a hiking blister.
What Causes Blisters Even When Your Boots Fit?
Good footwear dramatically reduces the risk, but it doesn’t guarantee blister-free feet.
You can still develop one because of:
- Wet socks
- Unusually long distances
- Foot swelling
- Sand or grit
- Wrinkled socks
- Repeated steep ascents or descents
- New insoles
- A change in your walking pattern
This is why I think blister prevention is better viewed as foot management rather than simply buying expensive footwear.
My Most Important Blister Prevention Tip
Pay attention to your feet.
That sounds ridiculously obvious, but it’s probably the thing people ignore most often.
The difference between a hot spot and a painful blister can sometimes be another twenty minutes of walking.
If something starts feeling wrong, deal with it.
I would rather make everyone wait for two minutes while I retie a boot and apply some tape than spend the next six hours limping.
Conclusion
Preventing hiking blisters mostly comes down to removing the conditions that allow repeated rubbing and skin damage to build up.
Start with footwear that genuinely fits your foot shape.
Use proper hiking socks.
Test new footwear before committing to a long route.
Keep your feet reasonably dry and deal with hot spots immediately.
Liner socks, lubricants, tape and blister dressings are all useful tools, but none of them can completely compensate for badly fitting footwear.
The longer the hike, the more seriously I take foot care.
Your feet are effectively your transport, and once they become painful every mile becomes harder than it needs to be.
A couple of minutes spent dealing with a hot spot early is almost always worth it.
I hope these tips help keep your feet blister-free on your next hike.




great article thank you!
[…] Learn to prevent hiking blisters […]