How to Make DIY Camp Shoes | Homemade Ultra-Lightweight Camp Sandals

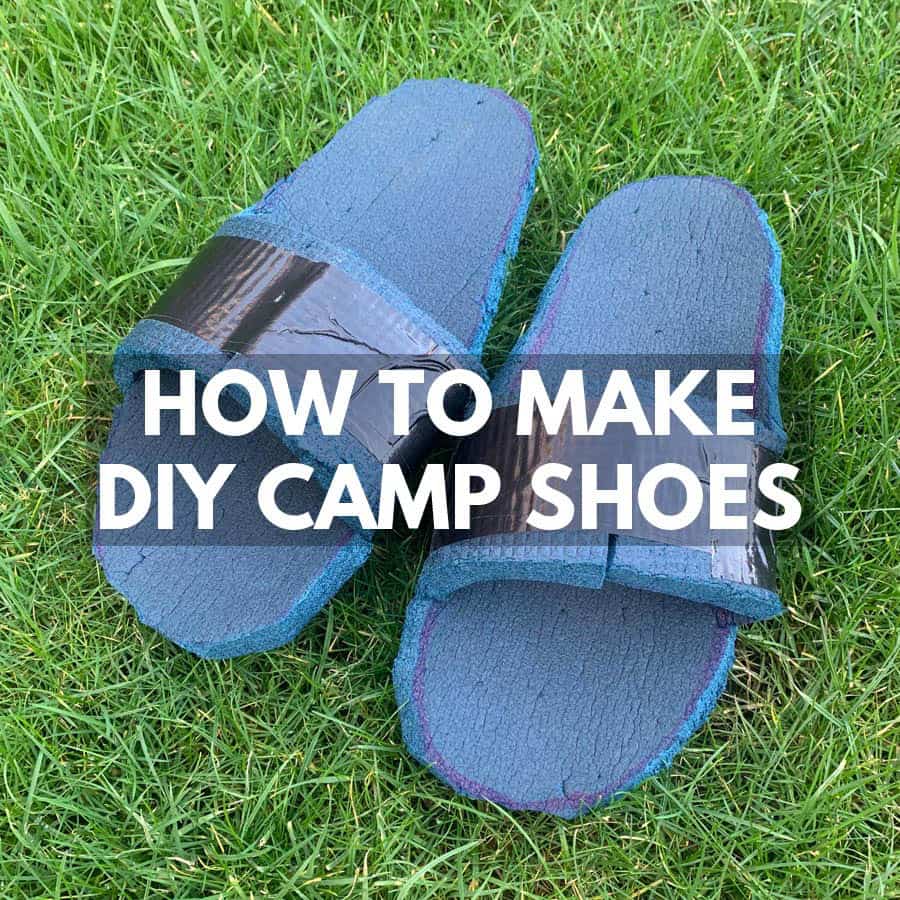
In this guide to DIY camp shoes, I show you how I made a simple pair of slip-on sandals from an old closed-cell foam sleeping pad. They cost almost nothing, take very little time to make and my finished pair weighed just 50 grams — lighter than any normal camp shoes I could find.
Guide to DIY Camping Shoes
While planning for my next long-distance thru-hike, I wanted a second pair of footwear to wear around camp in the evening and give my feet a break from my boots. I had always used Tevas and Sanuks, but once I started weighing everything individually, 400 grams suddenly felt like a lot for something I would mostly wear for a couple of hours at camp.
Enter DIY camp shoes.
I looked at barefoot shoes, Kevlar socks, more lightweight sandals, trail-running shoes and camping slippers, but everything was either heavier than I wanted or surprisingly expensive.
Eventually I discovered people making ridiculously lightweight camp footwear from old foam sleeping mats. I already had an old camping mat taking up space in the garage, so it seemed stupid not to give it a go.
As a bonus, there was still enough foam left over to make a small camping seat. Very much the lightweight hiking mindset without spending another penny.
DIY Camp Sliders vs String Sandals
There are two basic styles you can make from a foam sleeping pad without needing much craft skill. The first is a slider-style sandal using foam and duct tape, which is what I eventually chose.
The second is a more traditional sandal using cord to create a toe loop and heel strap. That style stays on your feet far better and is more useful if you actually need to move around, but cord against tired feet doesn’t sound particularly luxurious after you’ve already walked all day.
I’ve tried string-style sandals before and don’t really like the feeling of cord cutting into my skin, especially once my feet are tender from hiking. The foam sliders are much more slipper-like and comfortable around camp.
The trade-off is that they are exactly that: camp shoes. I would not rely on my DIY sliders for river crossings, scrambling or walking any meaningful distance.
What You Need to Make DIY Camp Shoes
You don’t need much:
- An old closed-cell foam sleeping mat
- Good-quality duct tape
- A marker pen
- Strong scissors or a craft knife
- A shoe, sandal or your own foot to use as a template
If you’ve already got an old foam mat lying around, the actual cost can be almost nothing.
How to Make Camping Shoes From a Foam Sleeping Pad
I decided to make sliders because I’m not a fan of thong-style sandals, especially when the strap is made from string. This was my first attempt, and although they looked pretty stupid, they were surprisingly comfortable and completely usable.
I already knew what I would change for version 2.0 — mainly making them slightly wider and tweaking the shape — but that’s part of the fun of making something yourself.
Step 1: Choose Your Foam Mat
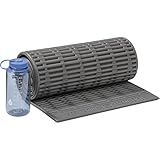
You want a closed-cell foam sleeping mat. These are the cheap foam camping mats that don’t inflate and are usually extremely light.
The mat I used was slightly thicker than average and happened to have a textured surface on one side that worked nicely as a basic tread. I wouldn’t go too thin because you still want enough foam between your feet and sticks, stones and cold ground.
You aren’t trying to build hiking footwear here, but there needs to be enough thickness that the shoes actually feel worthwhile.
Step 2: Draw the Footbed Outline

I used my Sanuks as the original stencil because they’re wide-fitting and incredibly comfortable. Put your shoe on the foam and draw around the outside using a marker.
If I were making them again, I would probably trace directly around my foot or use the insole from a comfortable shoe. That would give me a slightly closer fit and save another tiny bit of foam.
Don’t make both shoes yet. Make one prototype first, get the fit right, then use that as the template for the opposite foot.
Step 3: Add the Side Wings
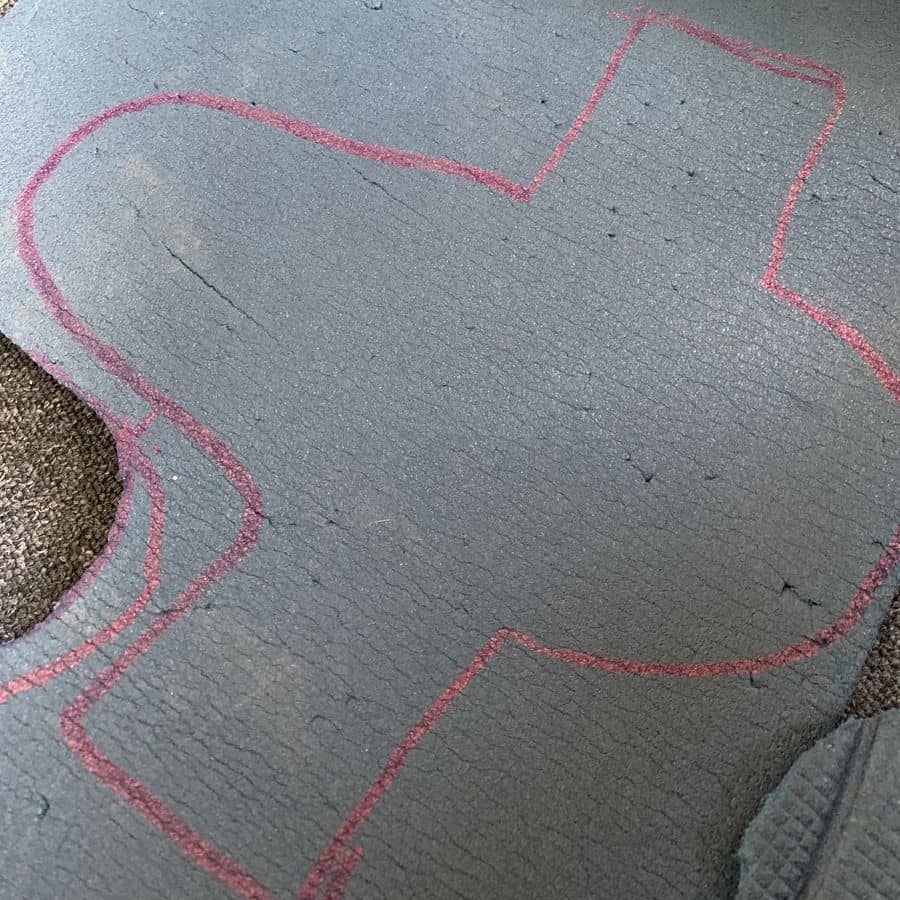
Once the footbed is marked, draw two wide wings extending from each side. These will fold over your foot and become the upper strap.
I put my foot in the middle of the outline and roughly worked out where I wanted the strap to sit. I angled mine slightly and kept the wings fairly wide so there was plenty of material for strength and comfort.
Give yourself more length than you think you need. You can always trim foam off later; adding it back on is considerably more difficult.
I also found that rounded corners worked better than sharp square ones. They fitted the shape of my foot better and didn’t create obvious weak points in the foam.
Step 4: Cut Around the Outline

Use a strong pair of scissors or a sharp craft knife to cut around the outline. If you’re using a knife, work on a proper cutting surface rather than discovering how easily a blade goes through both camping foam and your kitchen table.
Take your time around the curves. It doesn’t need to look perfect at this stage because you can tidy the edges once the sandal is assembled and you’ve tested the fit.
Step 5: Trim the Strap to Fit
Put your foot onto the foam and fold both wings across the top. Work out where they naturally meet.
Trim only a little at a time until the two sides meet comfortably across your foot. You want the strap secure enough that the sandal doesn’t immediately fall off but loose enough that it doesn’t squash your foot.
Getting this part wrong by cutting too much means returning to step one, so don’t get enthusiastic with the scissors.
Step 6: Use the First Shoe as a Reverse Template
Once you’re happy with the first shoe, flip it over and trace around it to make the second one.
This is especially important if your foam has a textured or treaded side. Make sure the second shoe is mirrored so that the grippier surface ends up facing the ground on both feet.
Then cut out the second sandal and check that both fit reasonably similarly.
Step 7: Tape the Straps Together
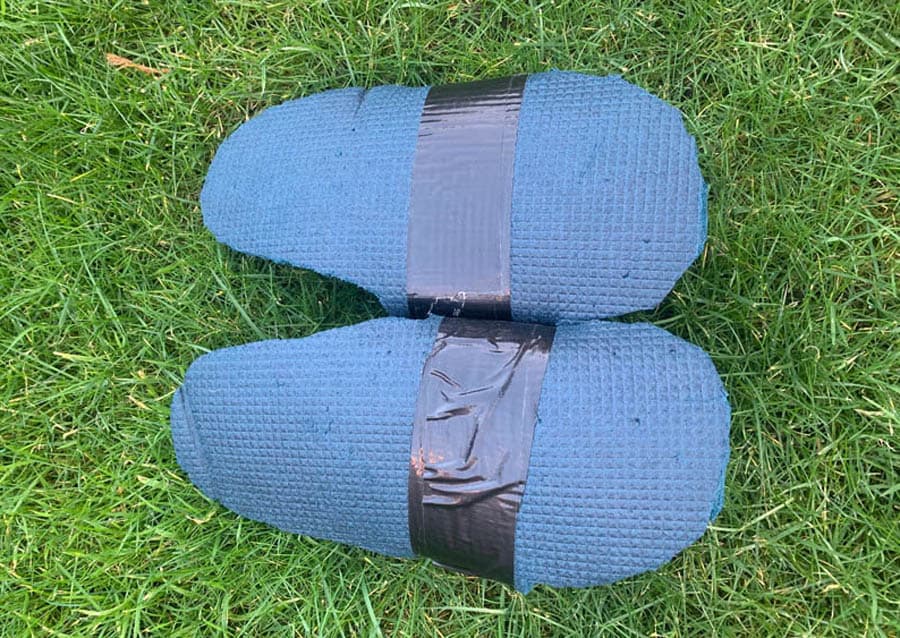
Next, use good-quality duct tape to join the two wings over the top of the sandal. I wrapped mine around the strap and underneath the sole several times, keeping the joint as tight and tidy as possible.
I used roughly four wraps around each shoe. You want enough tape to make the strap feel secure without completely covering your incredibly lightweight foam sandals in several hundred grams of duct tape and defeating the entire point.
And that’s basically it. You’ve made yourself a pair of ultralight camp slippers from an old sleeping mat.
Step 8: Tidy the Edges

Wear the finished shoes around for a little while before doing the final trimming. Once you actually walk in them, you’ll see where your foot naturally sits and which areas of foam are unnecessary.
Then trim away any obvious excess and smooth out rough corners.
This is much easier once the shoe is separated from the enormous rest of the camping mat, which is why I leave the final shaping until the end.
What I Learned Making My Own DIY Camp Shoes
- They are surprisingly warm. Foam matting insulates your feet from cold ground extremely well, which is lovely when you’ve taken your hiking boots off in the evening.
- Leave extra material initially. You can always trim more foam away, but you can’t put it back once you’ve cut too far.
- Your first attempt doesn’t need to be perfect. One full-size camping mat gives you loads of material for experimenting.
- Keep the pattern close to the edge. If you want to reuse the remaining mat as a seat pad or for another project, don’t cut your shoe shapes out of the middle for no reason.
- These are camp shoes, not walking sandals. Think slippers around the house rather than footwear for hiking, scrambling or river crossings.
- DIY gear doesn’t have to look pretty. If it does exactly what you need for almost no weight or money, who cares?
How Much Do DIY Camp Shoes Weigh?
The pair I made weighed an unbelievable 50 grams.
That was the entire reason this little experiment became interesting. I had been considering camp sandals weighing around 400 grams, so the DIY pair saved me roughly 350 grams without really costing me anything.
I couldn’t find anything remotely as light during hours of searching through products and forum threads. Obviously commercial camp shoes will be tougher, more supportive and better for walking, but for something whose entire job is letting my feet escape my boots for a couple of hours each evening, 50 grams is hard to argue with.
Are DIY Foam Camp Shoes Durable?
More durable than they look, but they’re still made from sleeping-mat foam and duct tape.
Walking around grass, dirt and an ordinary campsite shouldn’t cause many problems. Sharp rocks, sticks, gravel and rough surfaces will eventually start chewing through the foam.
The duct-tape strap is probably the easiest part to repair because you can simply add another piece of tape. If the sole itself tears badly, you’ve reached the point where making another pair may be easier than repairing them.
Can You Use DIY Camp Shoes for River Crossings?
I wouldn’t use this slider design for river crossings. They don’t have a heel strap, the foam can move around under your foot and the simple sole doesn’t provide the kind of reliable grip I want on slippery rocks.
A securely fitted sandal with a heel strap is a much better choice if you specifically need footwear for crossing water.
These are designed for walking around camp, making dinner and giving your feet a break from hiking shoes. That’s where they excel.
Why Carry Camp Shoes on a Thru-Hike?
Camp shoes are definitely a luxury item because you can simply loosen your hiking shoes or walk around camp in them. But after an entire day on your feet, getting out of damp boots and socks feels fantastic.
They’re useful for trips to the toilet, walking around shelters and giving your feet time to dry in the evening. The problem is that ordinary sandals can weigh several hundred grams, which is why ultralight hikers often decide they’re not worth carrying.
At 50 grams, that argument becomes much harder to make.
Can You Make Them Even Lighter?
Probably, and I can already hear the ultralight crowd reaching for the scissors.
You could remove more material around the edge, reduce the width of the strap or use thinner foam. At some point, though, you cross the invisible line between ultralight and stupid light.
Mine were already only 50 grams, so saving another few grams isn’t worth making them uncomfortable or having them fall apart on the first night.
Final Thoughts
My DIY camp shoes aren’t going to win any fashion awards, but they weigh 50 grams, cost practically nothing and do exactly what I need them to do.
That’s the part of ultralight hiking I enjoy most. You don’t always have to buy some exotic piece of gear made from space-age fabric. Sometimes an old sleeping mat, some duct tape and a bit of MacGyver thinking gets you something better suited to your needs.
If you’ve got an old closed-cell mat sitting in the garage, give it a go. Worst case, you’ve lost a small corner of an old sleeping pad. Best case, you’ve just made the lightest camp shoes you’ve ever owned.